
Step 1: Navigate to https://aem-stage-author.bms.com and click on Adobe Experience Manager icon at the left corner, as shown below.
Introduction to DAM
Introduction to DAM





DAM (Digital Asset Management) is the system where you can create, update, delete, retrieve, and process assets including images and documents. BMS IT will create a DAM resource for users where they can upload/manage those assets independently.
Step 1: Navigate to https://aem-stage-author.bms.com and click on Adobe Experience Manager icon at the left corner, as shown below.

Step 2: Click on Assets -> Files
We can create a new Folder or use existing to upload Assets. For Build Easy we will be using a defined structure as /content/dam/buildeasy/europe/<<brand name>>/ <<locale>>


Step 3: Click on Create button and then Folder to create a folder in DAM. A menu will pop up to provide details of folder title, name, folder metadata schema, private, and orderable. Once details are populated, click on Create button and it will create a folder in DAM.


Step 4: Click on the Create folder and it will allow you to upload assets. Then click on "Tap here" in the middle (shown below) or click on Create button (right corner) and then select files to upload the assets shown below.
Note: If you are going to have multiple cropping variations of this image (e.g., 2:3, 3:5, 16:9, etc.) please name the image carefully. This helps in identifying the asset later on.

Step 5: Once assets are uploaded, they will be available in the folder and can be referenced on site pages.

Step 6: You can edit the uploaded assets according to requirements.
Select a particular asset you want to Edit. Then a menu will be visible on top with options to copy, edit, download, add to collection, and other properties of the file.

Step 7: Click on "Edit" from menu to edit the asset.
Here you will have an option to crop image using below variations:
You will also have an option to rotate asset left and right. You can edit the asset as per your requirement and click on tick mark on top right to save the changes.

Step 8: Users can edit the properties of particular asset by selecting the asset and on top menu choosing Properties. A properties menu will open for that asset where you can update the details of assets show below.
Under the Basic tab we find options to give Metadata such as Title, Description (Caption), Long Title, Date 1, Language, Tags, Creator Tool, and Scheduled (de)activation (e.g., On Time & Off Time and References).

Under the Advanced tab we have options to give license details like Creator, Contributor, Copyright, Copyright Owner, Usage Terms, Expires date, Canonical URL, Disable Indexing (Search Crawler), and Rating options to provide rating to that asset.

Once the details have been provided, click on Save and Close button on the right corner to save the changes.
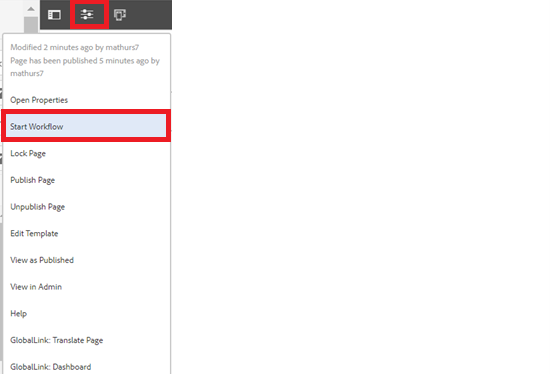
Step 9: After saving the asset, start workflow as shown below.
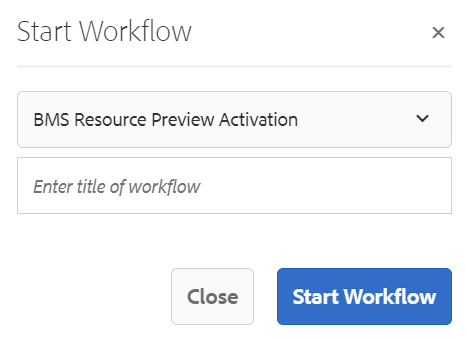
Once the assets got published status of the asset will be shown as shown in the below example
