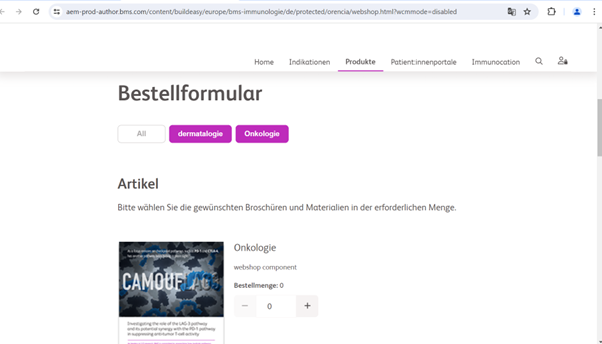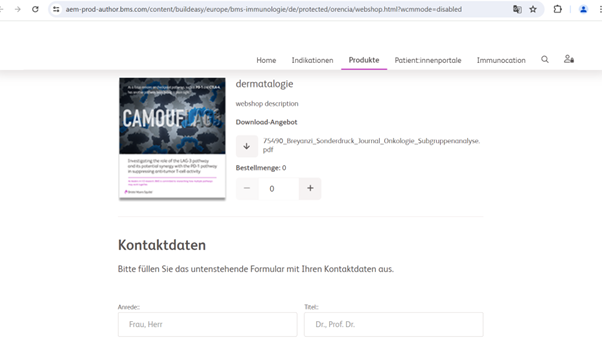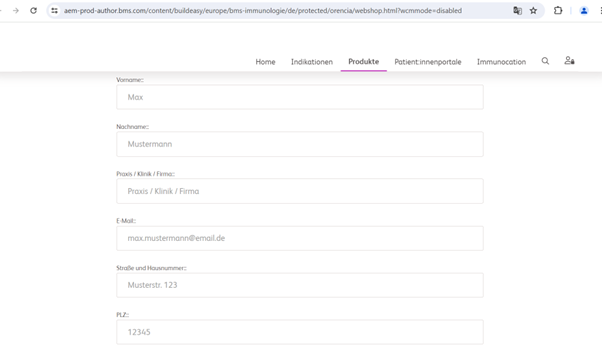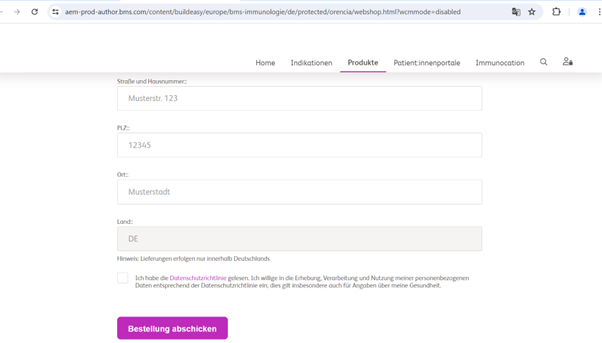
Step 1: Navigate to the page where you want to add the component. Click on "Drag components here" and click on + to add the component on page.
Web Shop Component - Manual Variation

Web Shop Component - Manual Variation





Step 1: Navigate to the page where you want to add the component. Click on "Drag components here" and click on + to add the component on page.

Step 2: Search and select webshop component from dropdown list and then drag and drop it onto the desired location on the page.
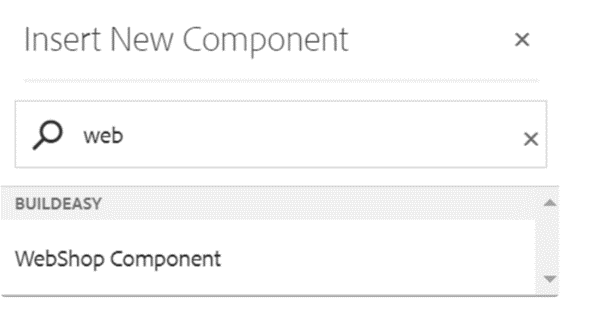
Step 3: Once the component is added, you can configure it by selecting configure icon as showcased in below image.

Step 4: In the component configuration dialog, you can author required properties.
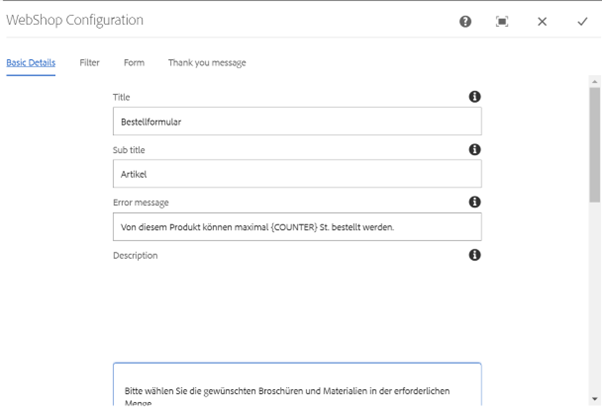
Authoring Fields
| Field | Description |
| Basic Details tab | |
| Title | This is very top heading for Webshop |
| Sub title | Specify the title of this webshop |
| Error message | This is a text authoring field to author Error message text. |
| Description | This is a text authoring rich text field to author description text. |
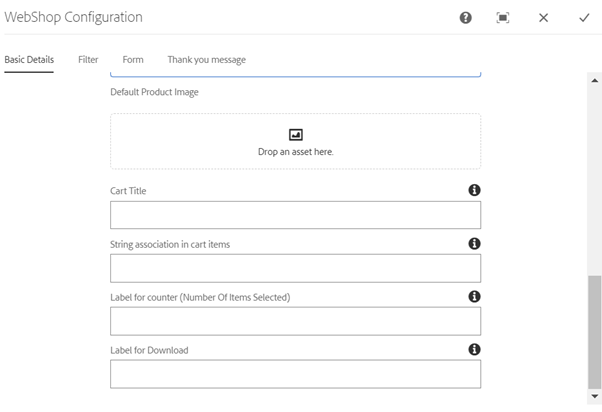
| Default Product Image | This is a path authoring field to author the image from dam. |
| Cart Title | This is a text authoring field to author cart title text. |
| String association in cart items | Enter string, this will be followed after number of items added on cart. For Example - 1st, 2st. where 1 and 2 is the cart items added in cart and followed string st is associate string value. If you don't want any string you can leave it blank. |
| Label for counter (Number Of Items Selected) | This is the label for counter that will be displayed right before counter selection items |
| Label for Download | This is the label for download file option. However, this will be generalize label show under which all attachment appear. |
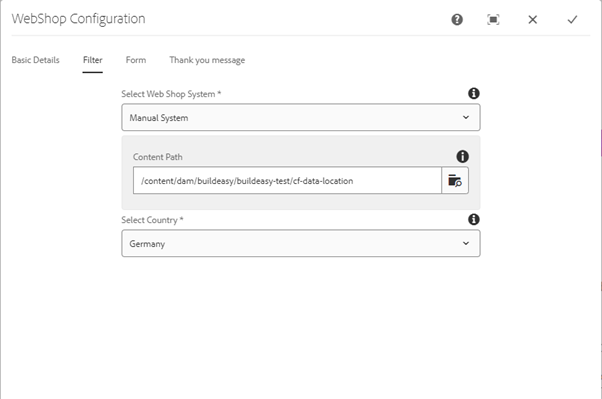
| Filter tab | |
| Select End System | This is a drop down field to select webshop End system type. ie Hybrizz, Manual |
| Hybrizz | |
| Select Comment Key | This is a drop down field to select webshop Comment keys |
| Frontend Filter display type | This is a drop down field to select the view to be displayed on the page applied for Top tags |
| select Filter | This is a drop down field contains filter list that contain list of tags that will be displayed on page and accordingly product will load on page. |
| Manual | |
| Content Path | This is a path browser field to author content fragments path where fragmens exists. path will be changed as per the site. |
| select Country | This is a drop down field to select country. |
| (Note: All the drop down fields are dynamically loading from generic lists.) | |
| Form tab | |
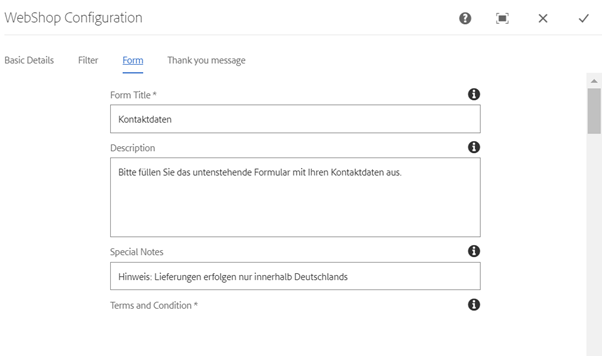
| Form Title | This is a text authoring field to author form title text. |
| Description | This is a text authoring rich text field to author description text. |
| Special Notes | This is a text authoring field to author special notes text. |
| Terms and Conditions | This is a text authoring rich text field to author Terms and conditions. |
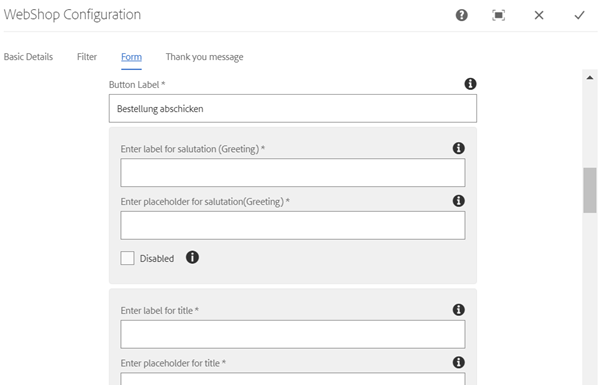
| Button Label | This is a text authoring field to author button text. |
| Note: All the below mentioned fields are language specific place holder fields If not authored default value will be displayed. |
|
| Enter label for salutation (Greeting) | This is a text authoring field to authoe Salutation label |
| Enter placeholder for salutation(Greeting) | This is a text authoring place holder field to authoe Salutation suggestion text |
| Disabled | Select the checkbox if you want to remove this field from frontend Webshop order form. |
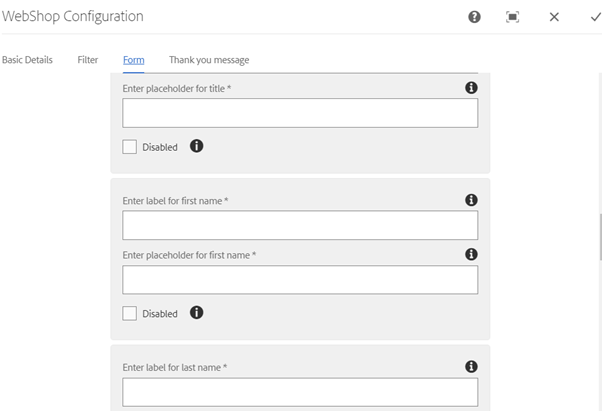
| Enter label for title | This is a text authoring field to authoe title label |
| Enter placeholder for title | This is a text authoring placehlder field to authoe title suggestion text |
| Disabled | Select the checkbox if you want to remove this field from frontend Webshop order form. |
| Enter label for first name | This is a text authoring field to author First name label |
| Enter placeholder for first name | This is a text authoring placeholder field to author First name suggestion text |
| Disabled | Select the checkbox if you want to remove this field from frontend Webshop order form. |
| Enter label for last name | This is a text authoring field to author Last name label |
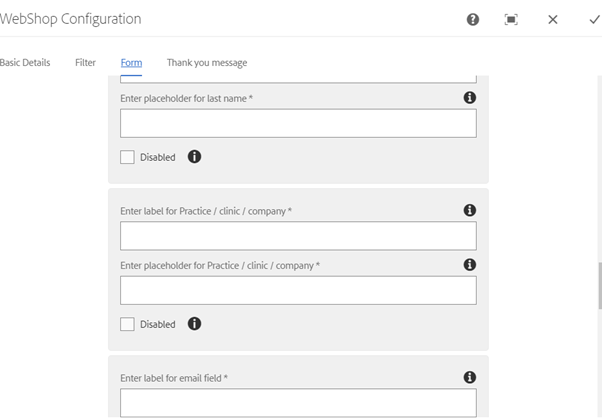
| Enter placeholder for last name * | This is a text authoring placeholder field to author Last name suggestion text |
| Disabled | Select the checkbox if you want to remove this field from frontend Webshop order form. |
| Enter label for Practice / clinic / company | This is a text authoring field to author label for Practice / clinic / company |
| Enter placeholder for Practice / clinic / company | This is a text authoring placeholder field to author Practice / clinic / company suggestion text |
| Disabled | Select the checkbox if you want to remove this field from frontend Webshop order form. |
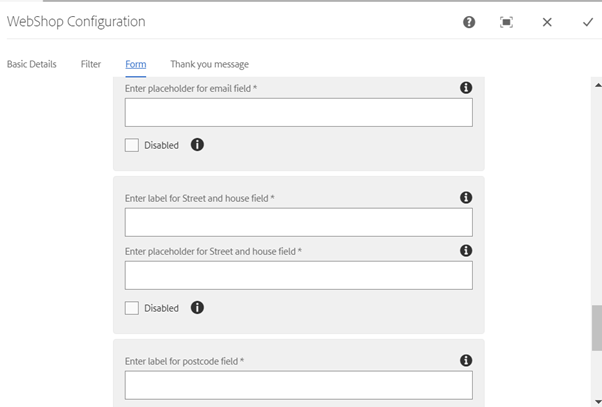
| Enter label for email field | This is a text authoring field to author label for Email |
| Enter placeholder for email field | This is a text authoring placeholder field to author Email suggestion text |
| Disabled | Select the checkbox if you want to remove this field from frontend Webshop order form. |
| Enter label for Street and house field | This is a text authoring field to author address label |
| Enter placeholder for Street and house field | This is a text authoring placeholder field to author steet and house suggestion text |
| Disabled | Select the checkbox if you want to remove this field from frontend Webshop order form. |
| Enter label for postcode field | This is a text authoring field to author postcode label |
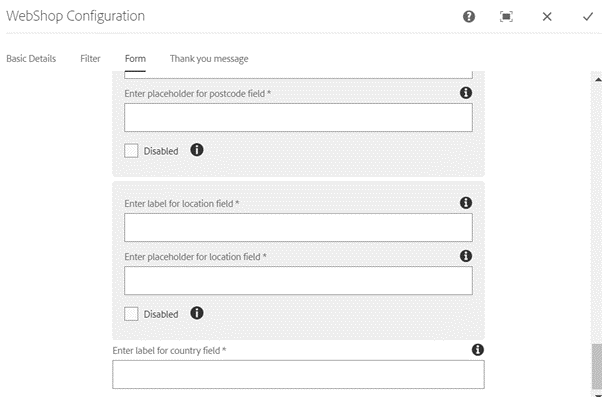
| Enter placeholder for postcode field | This is a text authoring placeholder field to author postal suggestion text |
| Disabled | Select the checkbox if you want to remove this field from frontend Webshop order form. |
| Enter label for location field | This is a text authoring field to author location label |
| Enter placeholder for location field | This is a text authoring placeholder field to author location suggestion text |
| Disabled | Select the checkbox if you want to remove this field from frontend Webshop order form. |
| Enter label for country field | This is a text authoring field to author country label. |
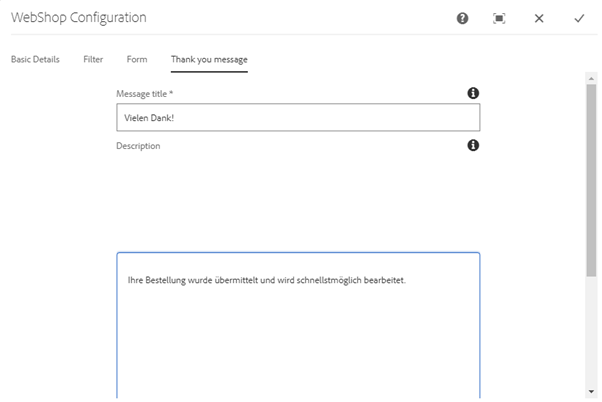
| Thank you Message tab | |
| Message title | This is a text authoring field to author message title text. |
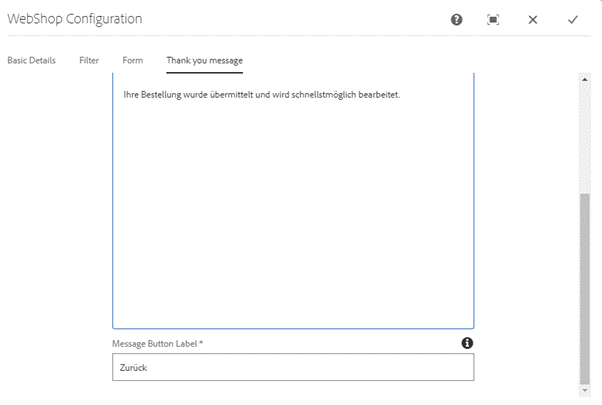
| Description | This is a text authoring rich text field to author description text. |
| Message Button Label | This is a text authoring field to author button text. |
Local Configuration for Manual Webshop :
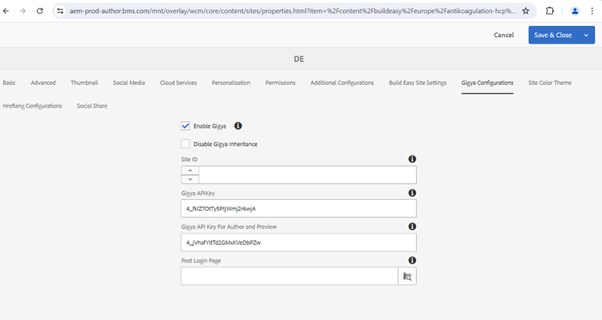
1) In the local page properties click on tab Gigya Configurations. add Site ID..
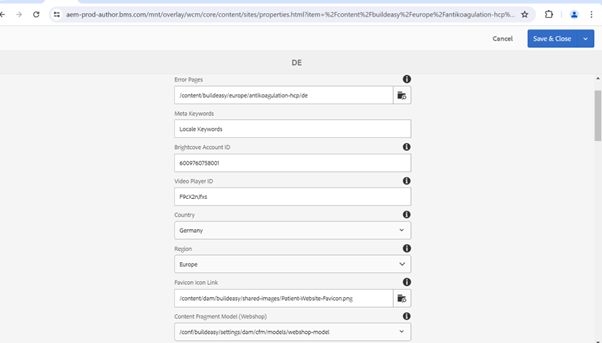
2) In the page properties of additional configurations we need to add specific region and Content Fragment Model(Webshop)
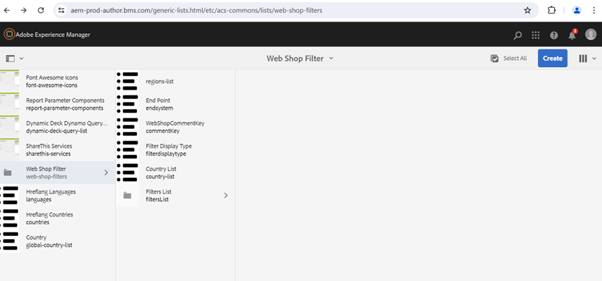
3) In the additional configurations of page properties, If we do not find the region in the given drop down, you can add it on region generic list under ACS Commons. Please make sure this region value should match with Commerical console defined regions
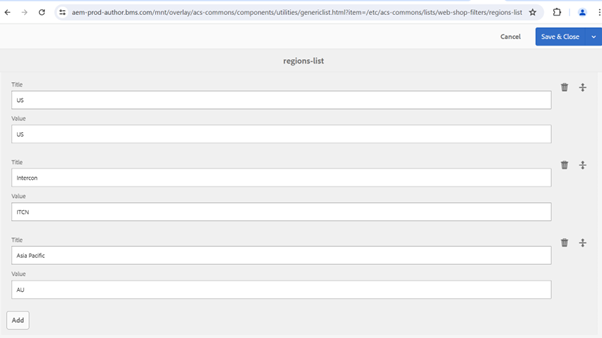
4) After selecting the regions list, click on the properties and add the required regions as shown below.
Content Fragment Creation For Web Shop Component Manual Variation :
Step 1: While selecting the Manual system variation in Select Web Shop System, we need to author the Content path of the content Fragment
Ex: /content/dam/buildeasy/buildeasy-test/cf-data-location
Step 2: To create the content fragment we need to navigate to the path of /content/dam/buildeasy create the specific folder and click on Create, Create content fragment button
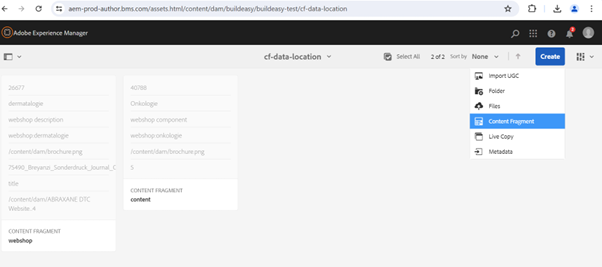
Step 3: After selecting create content fragment it will ask to select the model, So we need to select WebShop Data Model-(WDM)
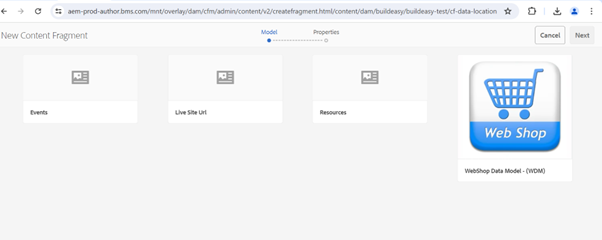
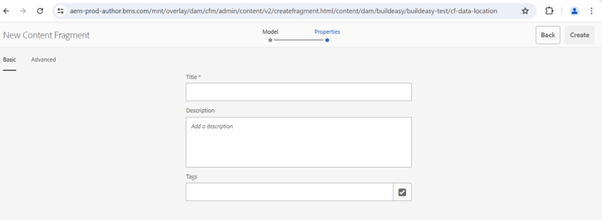
Step 4: We need to click next and give the respective Title and Description and then click on Create
Step 5: After creating, open the content fragment and author the required fields.
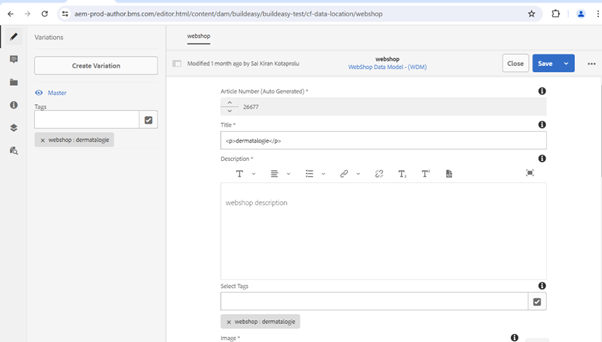
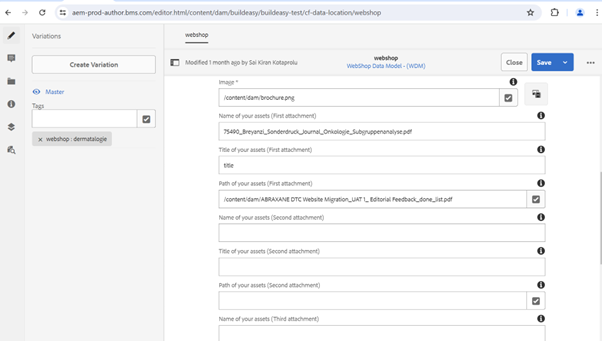
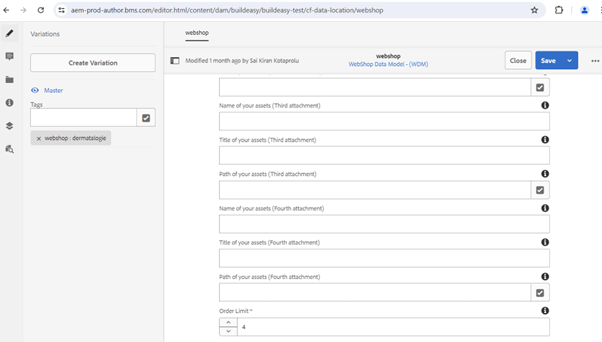
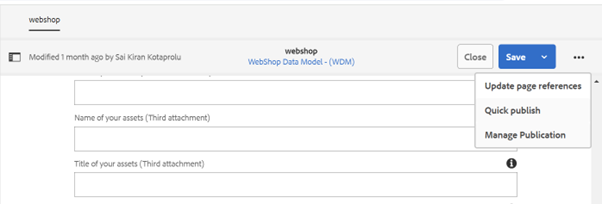
Step 6: Once after authoring the fields we need to Quick Publish the page
The data on the page will be coming from the Content Fragment.