Step 1: Authoring Experience Fragment
To use ISI component, Experience fragments need to be authored.
A experience fragment can be created by navigating to Navigation -> click on Experience fragment as shown in the below example.
ISI Component

ISI Component





The ISI Component, located at the bottom of the page, Inside Footer Component
Step 1: Authoring Experience Fragment
To use ISI component, Experience fragments need to be authored.
A experience fragment can be created by navigating to Navigation -> click on Experience fragment as shown in the below example.

Step2: Create experience fragment by clicking “create” in the respective folder and then select Experience Fragment

Step 3: Search and select the “BuildEasy Experience Fragment ” template from the available templates.

Step 3: Click on next and author the properties. Below is a reference. Next click on create

Step 4: Select the created experience fragment master click on edit and author ISI component.

step 5. Click on "Drag components here" and click on + to add ISI component on page.

Step 6: Search and select ISI component from dropdown list and then drag and drop it onto the desired location on the page.

Step 7: Once the component is added, you can configure it by selecting configure icon as showcased in below image.

Step 8: In the component configuration dialog, you can author ISI tab.


Authoring Fields
| Field | Description |
| Text tab | |
| Multi ISI | This is a checkboc field, if enabled multi isi tab will be displayed (Note: Multi ISI fields will take precedence over ISI tab fields.) |
| Low Transition | This is a richtext authoring field to author Low transition text. |
| Description | This is a richtext authoring field to author description for Low transition text. |
| Mid Transition | This is a richtext authoring field to author Mid transition text. |
| Description | This is a richtext authoring field to author description for MId transition text. |
| High Transition | This is a richtext authoring field to author High transition text. |
| Description | This is a richtext authoring field to author description for High transition text. |
| Override description path | This is a path browser field to author experience fragment path, to render content from experience fragment by overriding description field. |
| Expand/Collapse Icon | Expand/Collapse icons are available in two different options. Chevron Plus |
| More Label | This is a text authoring placeholder field to author more label text |
| Hide Label | This is a text authoring placeholder field to author hide label text |
| Mobile View Label One | This is a text authoring placeholder field to author Label one |
| Mobile View Link one | This is pathbrowser field to author link on click of Mobile View Label one text it will redirect to the link page. |
| Mobile View Label two | This is a text authoring placeholder field to author Label one |
| Mobile View Link Two | This is pathbrowser field to author link on click of Mobile View Label two text it will redirect to the link page. |
| Background Color | This is a color picker field to choose background color for ISI Header. |
| Multi ISI Tab | |
| Anchor ID | Text authoring field to provide anchor id, Authored id can be used any where on the page as a link, upon clicking on the link it will be redirected to current path. |
| Text | This is a richtext authoring field to author text. |
| Headline title | This is a richtext authoring field to author headline title. |
Step 9 To render ISI component authored in Experience fragment to page Navigate to locale page properties Build Easy Site Settings and author ISI Configurations. For more information Click Here
(Note : If user dont want ISI to render from locale page for specific Page and subsequent child pages navigate to required page properties and Override ISI. For more informantion Click Here)
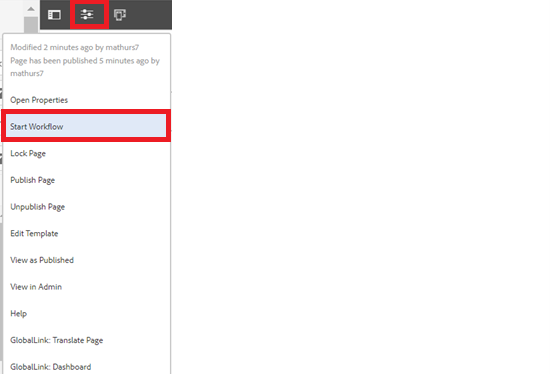
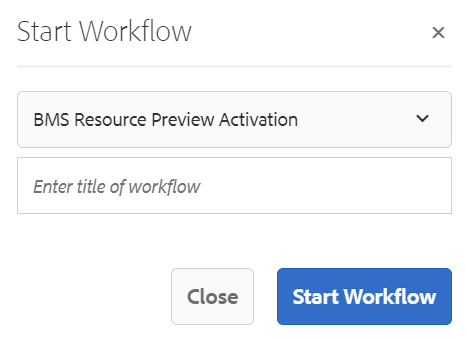
Step 10: After authoring all the fields, start the workflow as shown below.